Arduino Micro USB-MIDI
I have written on a page how to turn Arduino Uno into a USB-MIDI device. In this page, I wrote to turn Arduino Micro into a USB-MIDI. It's easier than the Arduino Uno case. This way should work for any Arduino listed in this table, not just the Arduino Micro. However, I haven't tried them all.
We will use the Arduino librarys below. There are two libraries that turn Arduino to USB-MIDI. These are two slightly different types. There is no need to install both libraries.
- MIDIUSB
- USBMIDI
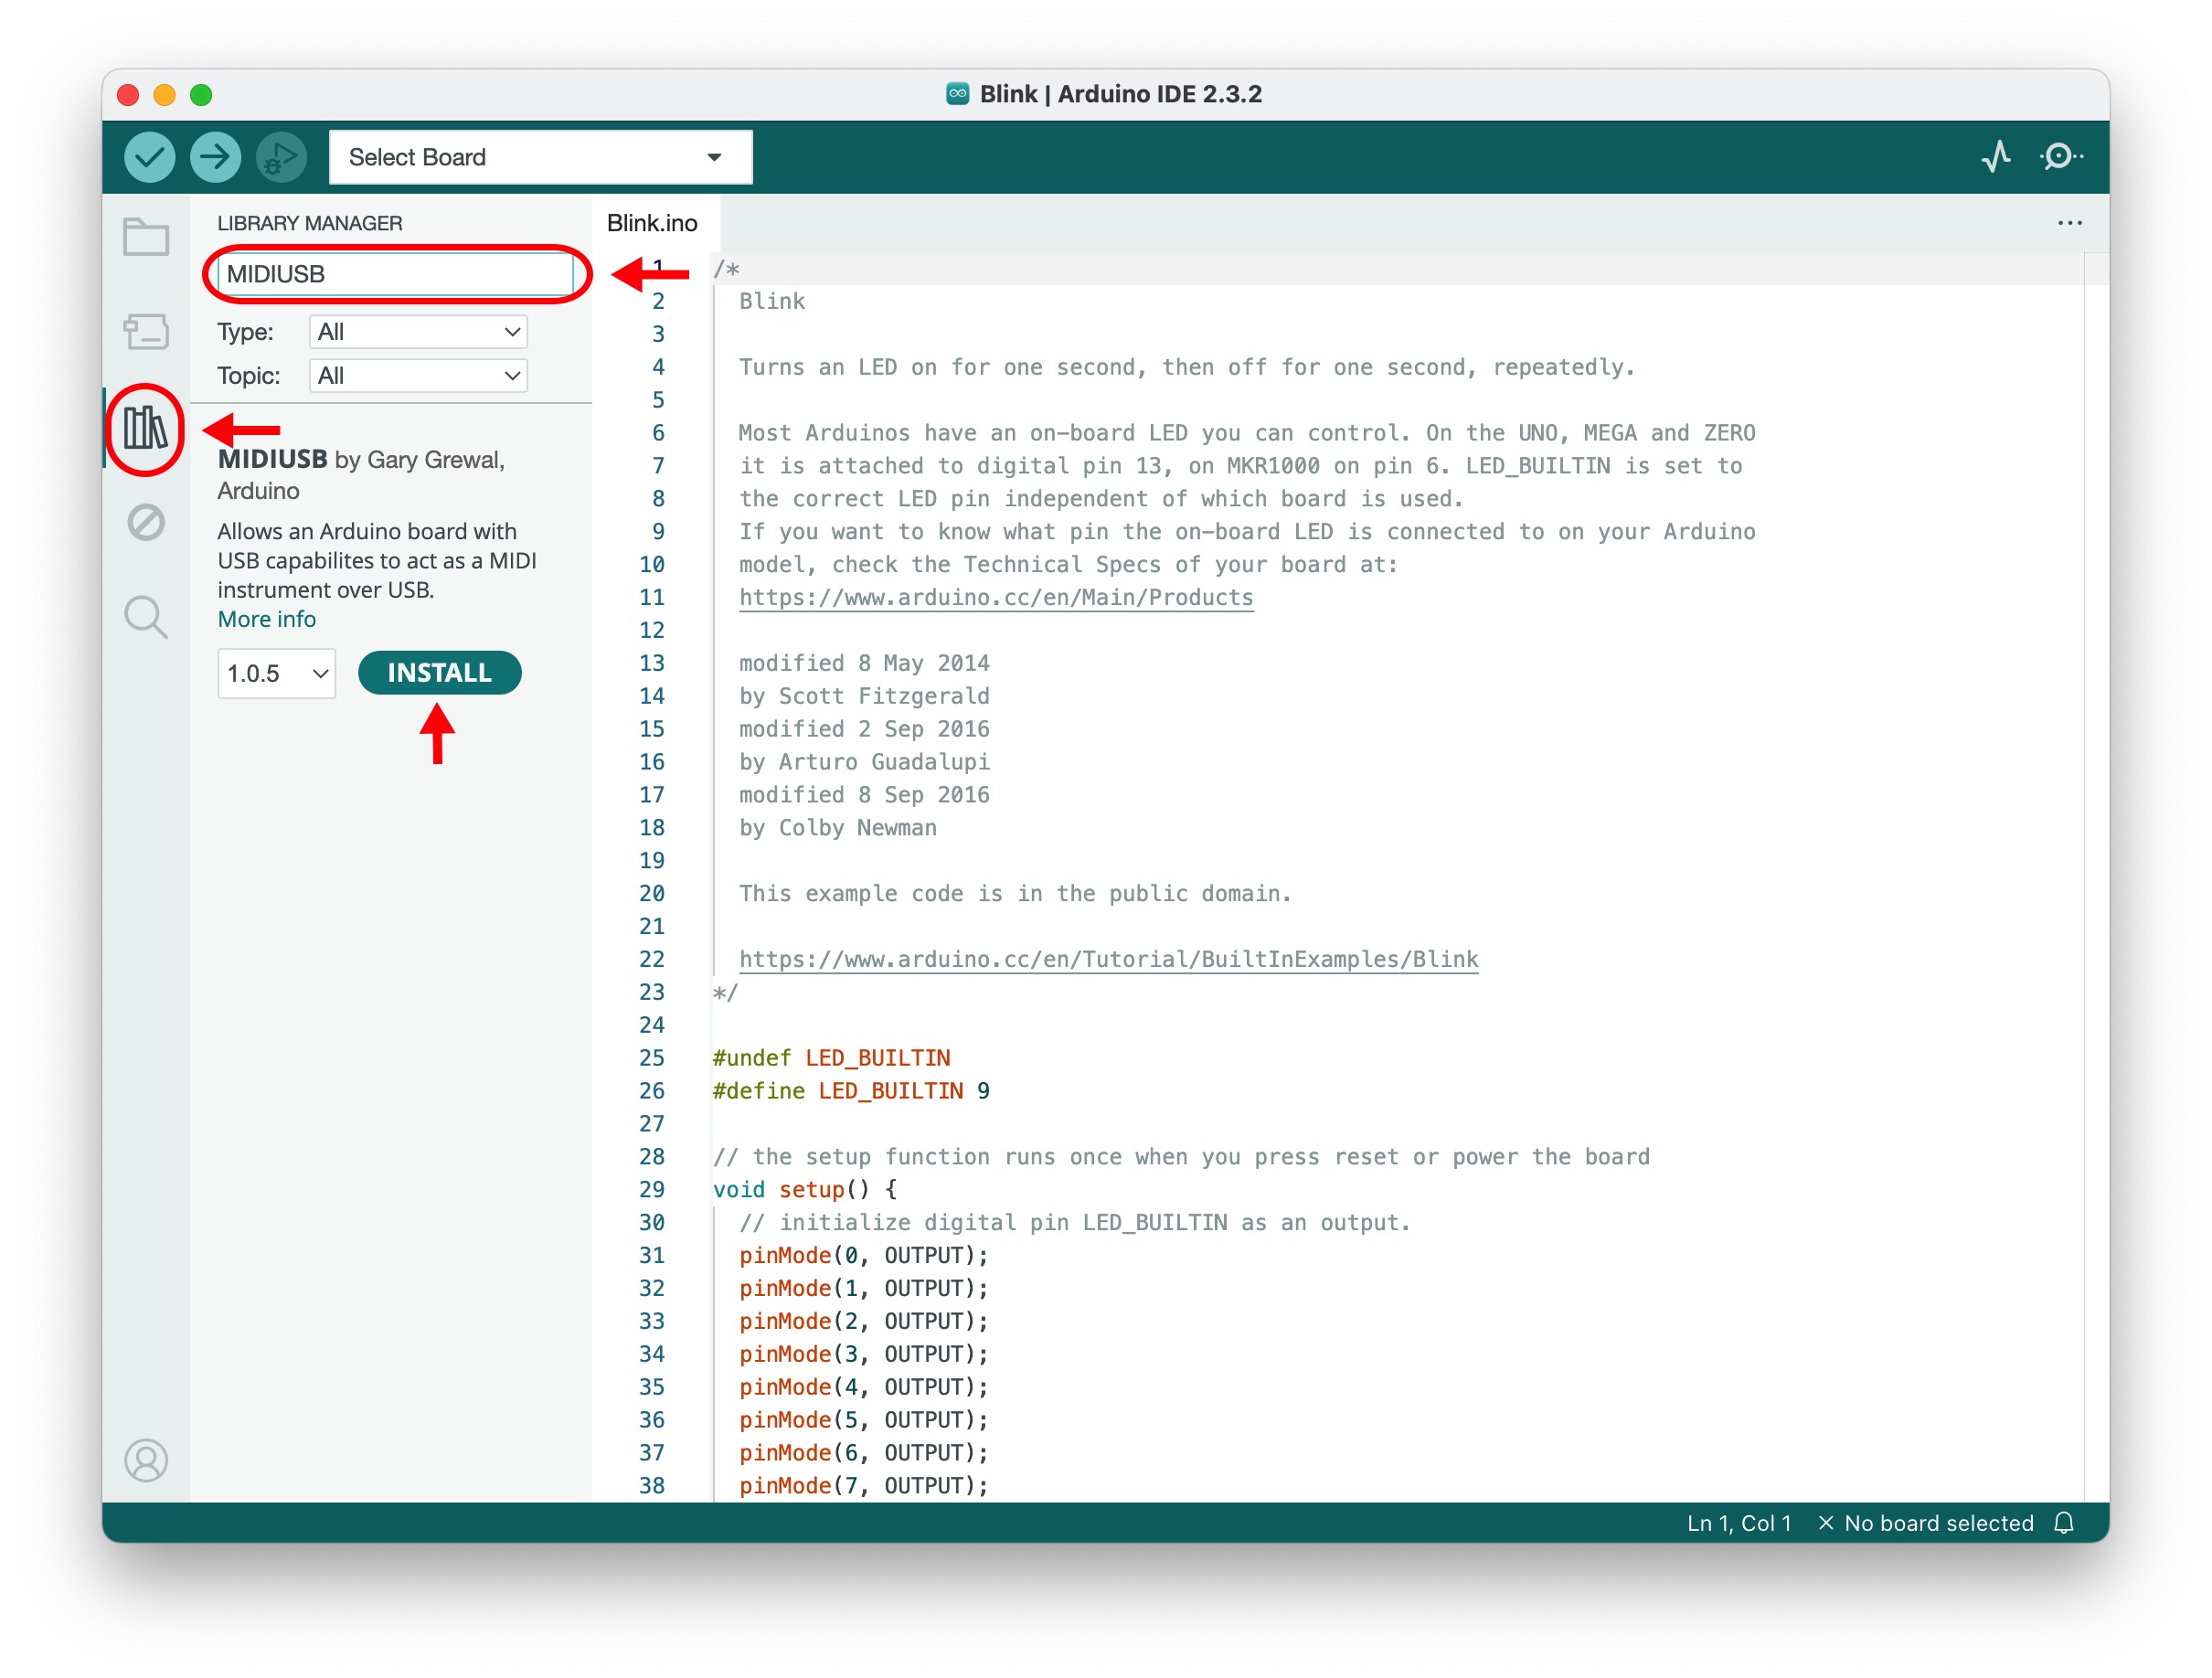
Install the MIDIUSB
My Arduino IDE version is 2.3.2. Click the bookstand icon from the left menu of the Arduino IDE. Enter "MIDIUSB" in the text box under LIBRARY MANAGER, in left menu top. Click Install button.
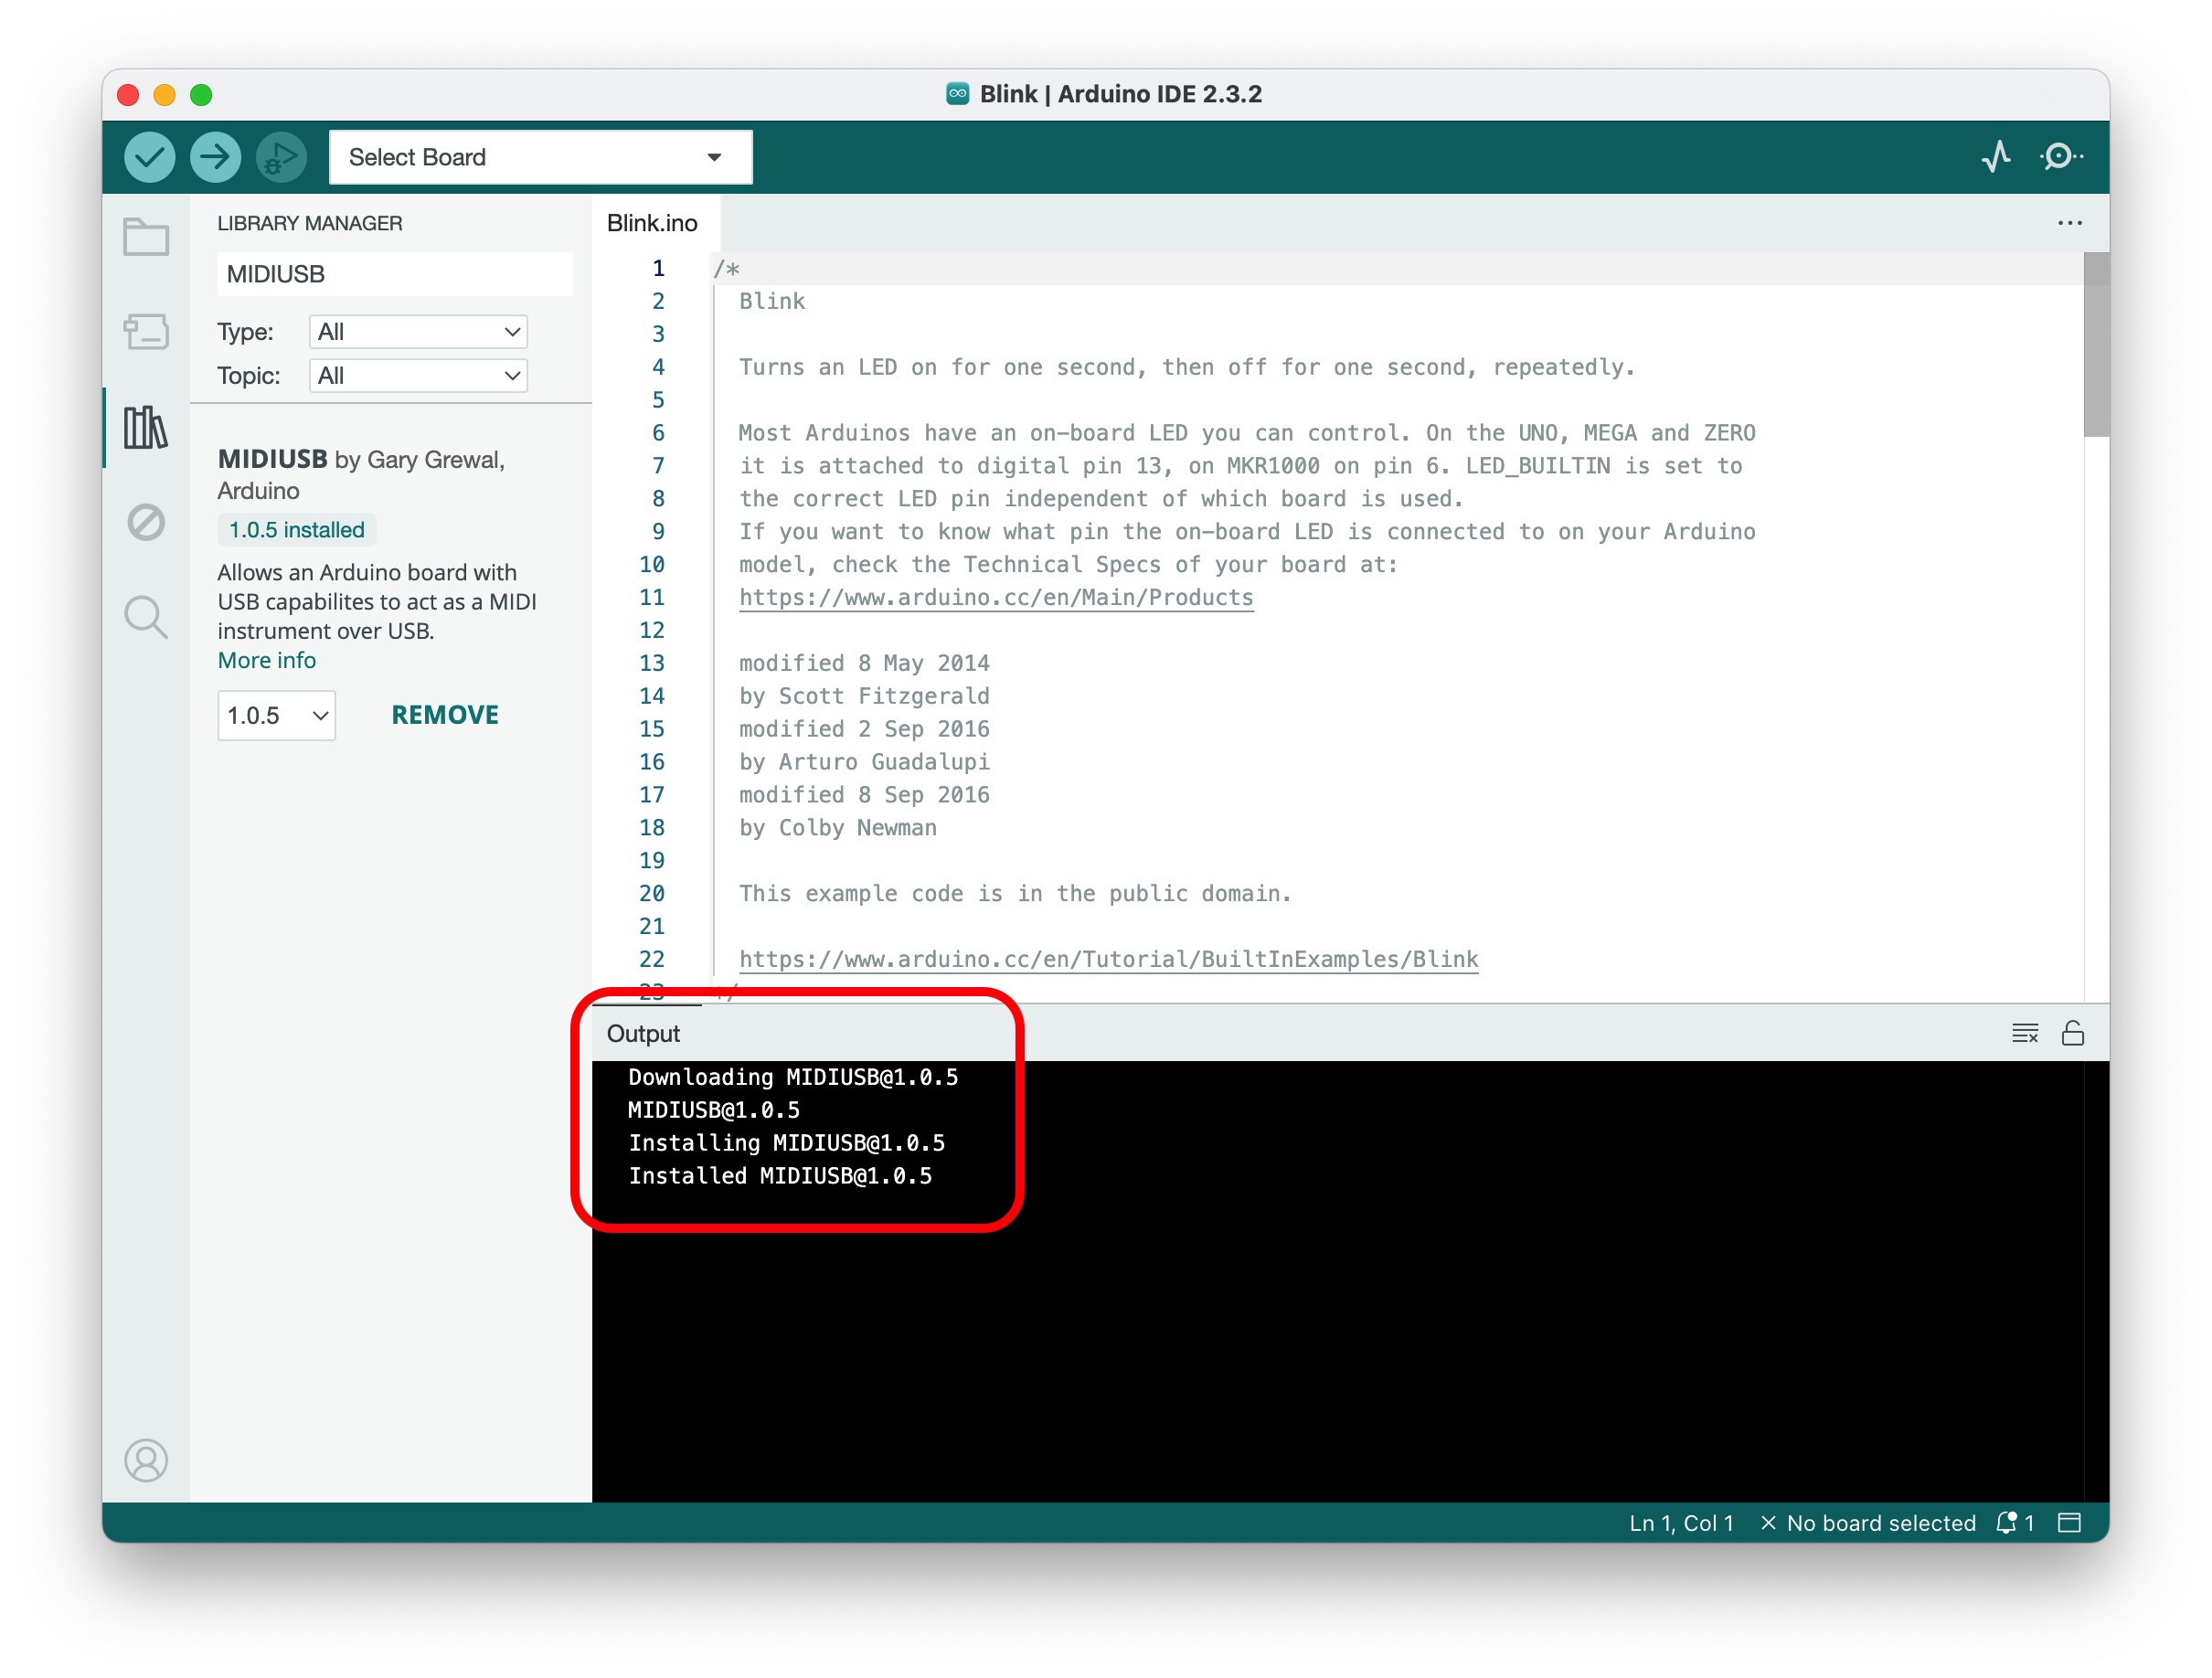
When you click the Install button, an Output box will appear in the bottom right, and the installation result will be displayed inside it as “Installed MIDIUSB@1.0.5”. That's all.
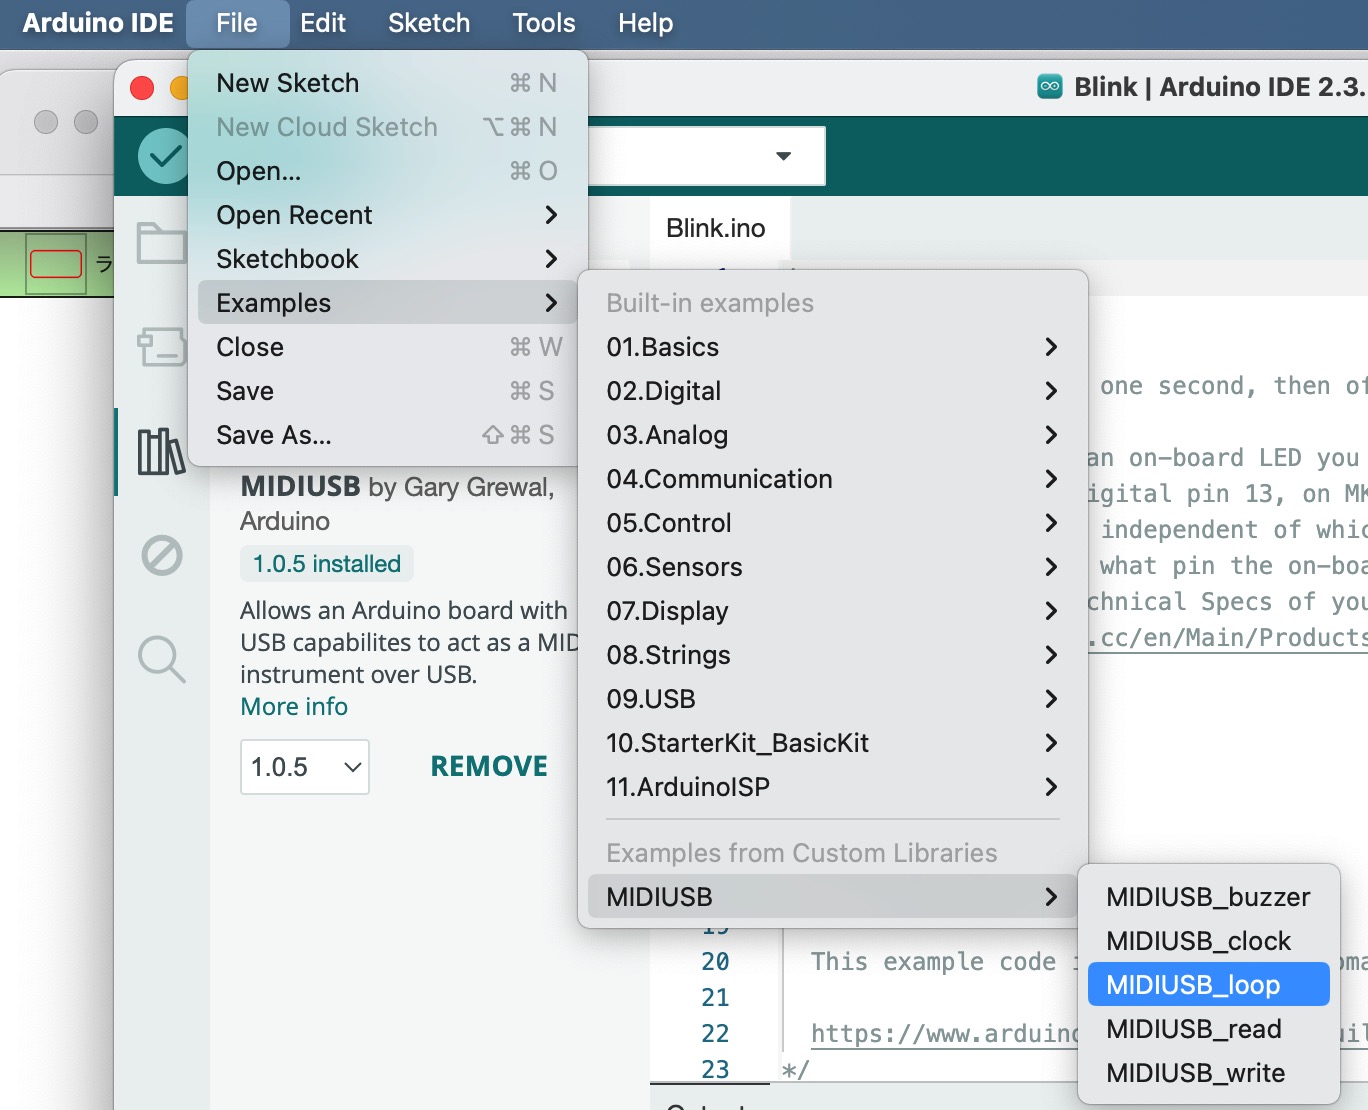
Check if the library is installed. Select "Sketch Examples" from the "File" menu. The MIDIUSB sketch is at the bottom.
Install the USBMIDI
The installation way is the same as for MIDIUSB. Click the bookstand icon from the left menu of the Arduino IDE. Enter "USBMIDI" in the text box. Click Install button.

The USBMIDI sample sketch is as follows.

Try using MIDIUSB/MIDIUSB_loop
This program allows the Arduino to receive MIDI messages and then send the same messages back out. Let's take a look at the program. MIDIUSB.h is included at the beginning of the program.
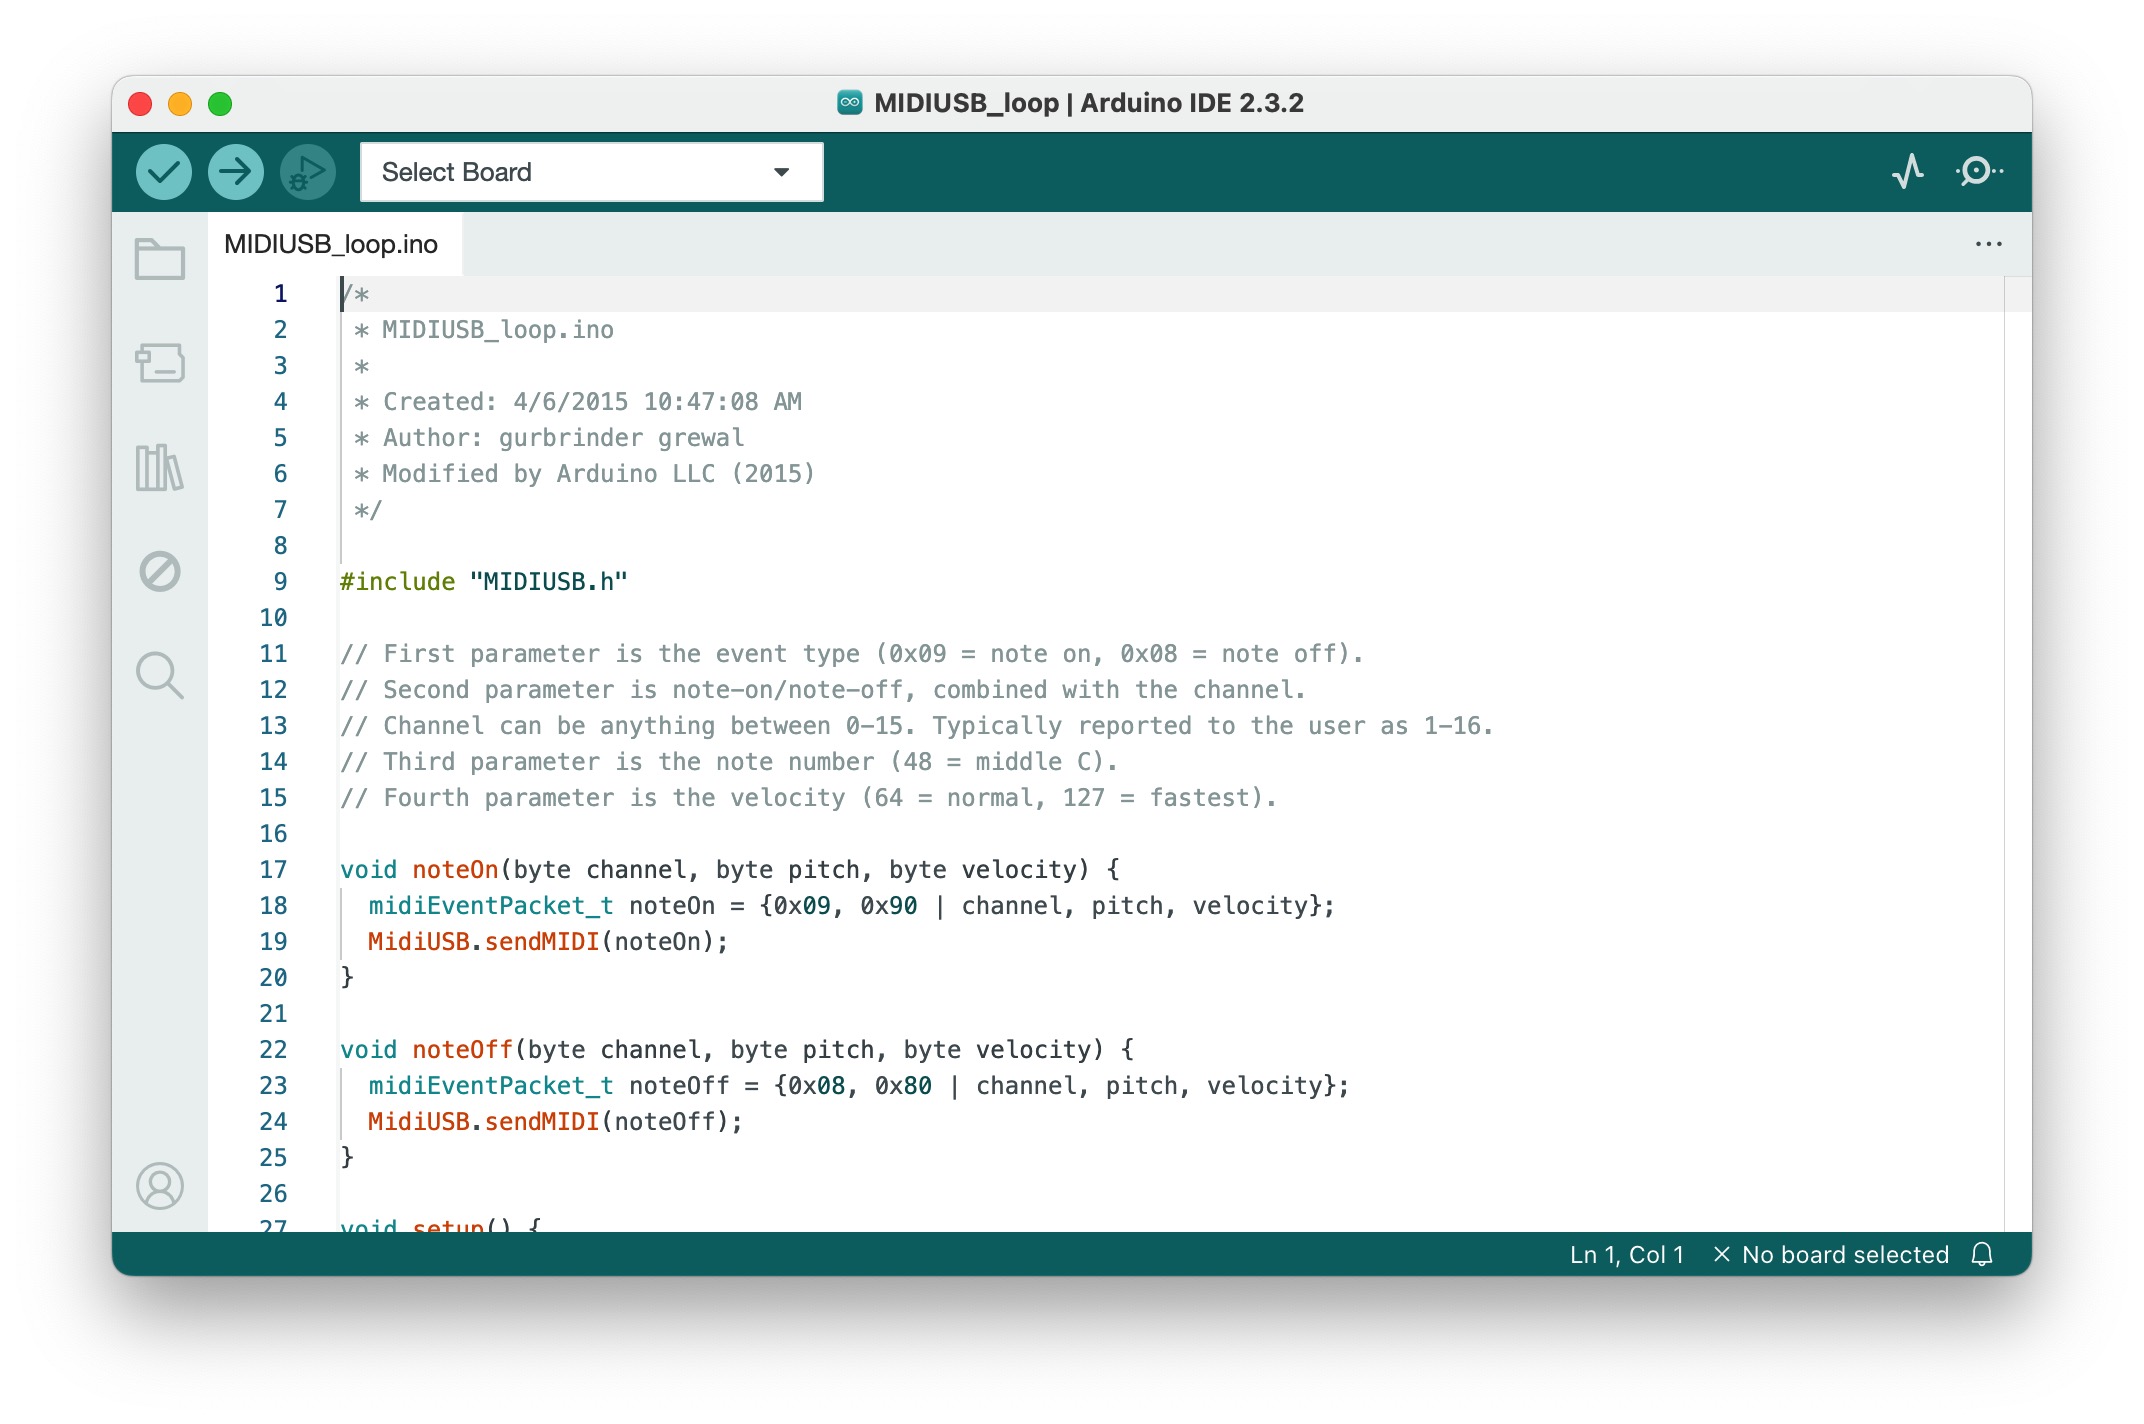
An instance of the MidiUSB class for sending and receiving MIDI is created in MIDIUSB.cpp
.MIDI_ MidiUSB;
MIDI messages are communicated using the structure midiEventPacket_t, which is defined in MIDIUSB_Defs.h.
typedef struct
{
  uint8_t header;
  uint8_t byte1;
  uint8_t byte2;
  uint8_t byte3;
} midiEventPacket_t;
In the loop function, MIDI is read in with MidiUSB.read() and a message is placed in rx. If no MIDI is being received, rx = 0. If a MIDI message is received, it is output with MidiUSB.sendMIDI(rx).
void loop() {
  midiEventPacket_t rx;
  do {
    rx = MidiUSB.read();
    if (rx.header != 0) {
      //send back the received MIDI command
      MidiUSB.sendMIDI(rx);
      MidiUSB.flush();
    }
  } while (rx.header != 0);
}
Upload this program to the Arduino Micro. Connect the PC and Arduino Micro with a USB cable. Write MIDIUSB_loop to Arduino Micro. To write, click the Upload button in the Arduino IDE. Arduino Micro turn into USB-MIDI deviuce.

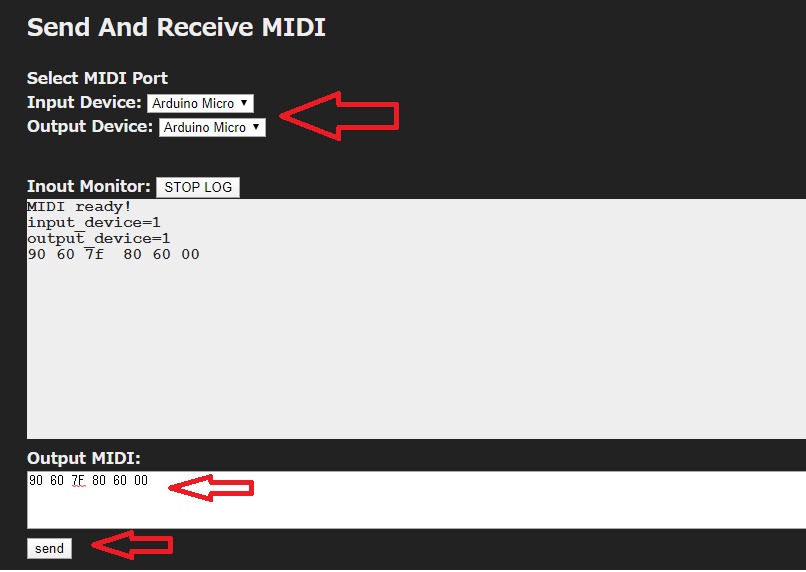
Open Send And Receive MIDI in a browser. Arduino Micro is displayed in MIDI Input Device and Output Device. Enter an appropriate MIDI message in the Output MIDI field and press the Send button. The MIDI message will be sent to Arduino Micro. The MIDI message returned from Arduino Micro will be displayed in the Inout Monitor field.
Try using USBMIDI/UsbMidiLoopback
A distinctive feature of USBMIDI is that it uses a library called V-USB. The vusb folder is installed in USBMIDI
── USBMIDI
   ├── LICENSE
   ├── README.md
   ├── examples
   ├── keywords.txt
   ├── library.properties
   ├── src
   └── vusb
       └── usbdrv
UsbMidiLoopback is a loopback MIDI program. usbmidi.h is included at the beginning of the program.
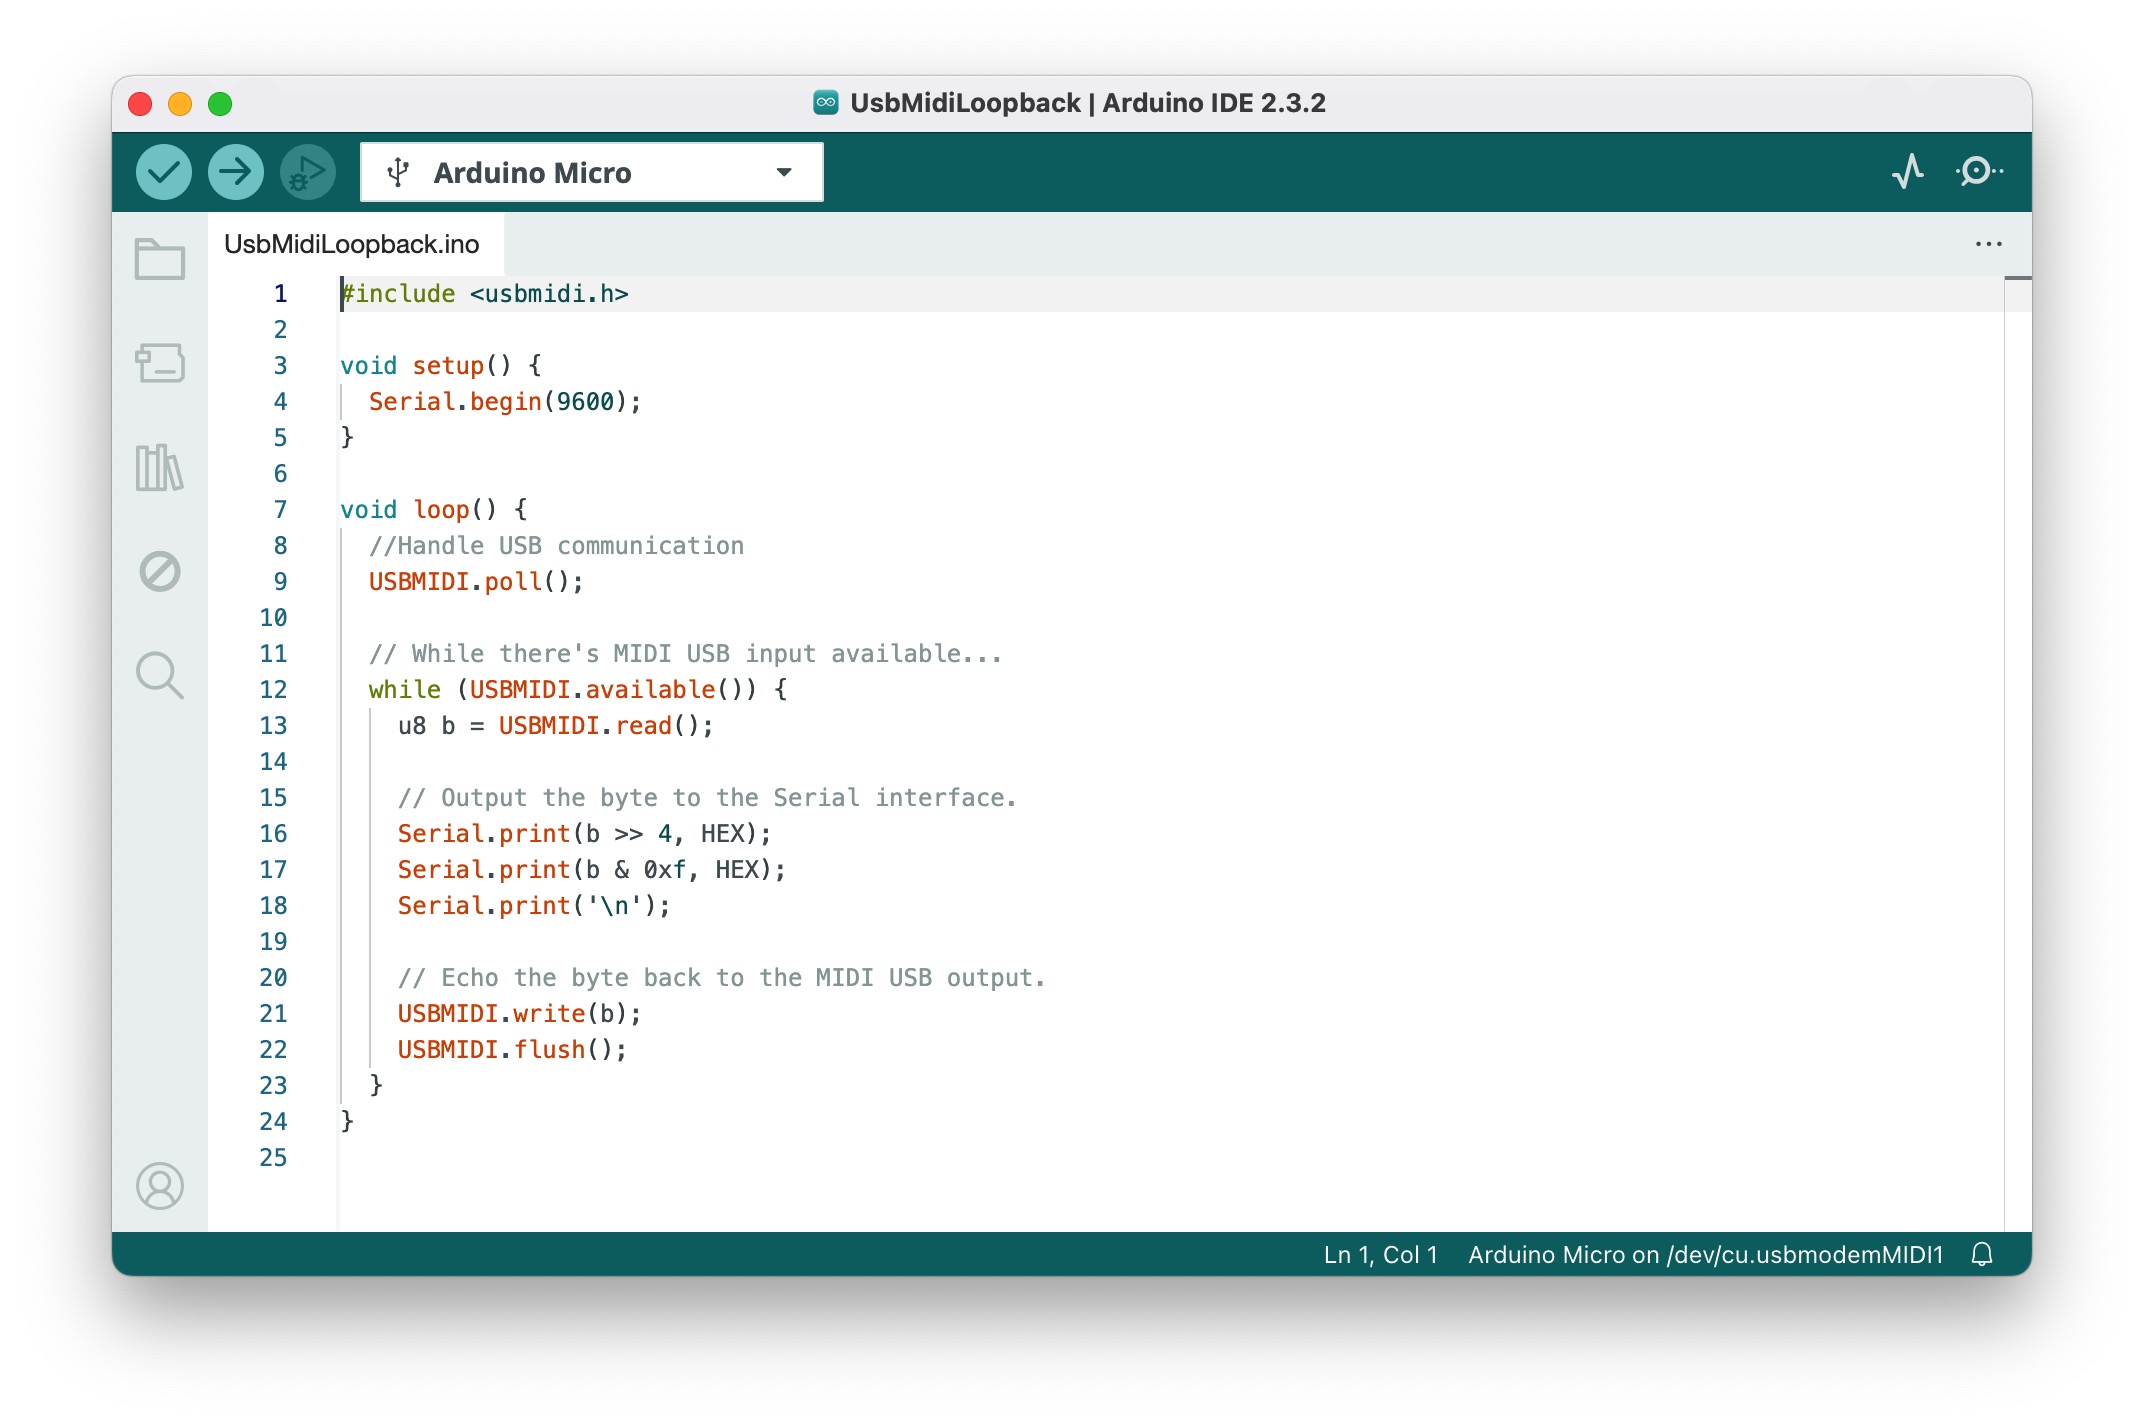
An instance of the USBMIDI class for sending and receiving MIDI is created in usbmidi_vusb.cpp
USBMIDI_ USBMIDI;
In the loop function, MIDI messages are received one byte at a time using USBMIDI.read(). Similarly, messages are sent one byte at a time using USBMIDI.write(b).
void loop() {
  //Handle USB communication
  USBMIDI.poll();

  // While there's MIDI USB input available...
  while (USBMIDI.available()) {
    u8 b = USBMIDI.read();

    // Output the byte to the Serial interface.
    Serial.print(b >> 4, HEX);
    Serial.print(b & 0xf, HEX);
    Serial.print('\n');

    // Echo the byte back to the MIDI USB output.
    USBMIDI.write(b);
    USBMIDI.flush();
  }
}
Open Send And Receive. Select Arduino Micro as the MIDI Input/Output Device. At the same time, open the Serial Monitor in the Arduino IDE. Enter appropriate MIDI Messages in the Send Box of Send And Receive. Click the Send button. The messages will be displayed in the Input Monitor and the MIDI Message will be displayed one byte at a time in the Serial Monitor.
